Thursday, July 9, 2009

Wonton Wrapper Ravioli


This recipe is painfully easy. It's also impressive. Easy + impressive = honkin' AWESOME in my book, though I don't know about you all.


Who makes their own ravioli? Awesome people, that's who. This recipe is great, because it's completely customizable. Do you have a meat lover in the family? Fill the ravioli with seasoned Italian sausage and mozzarella. Health conscious vegetarian? Fill the ravioli chock full of mushrooms, spinach, diced asparagus, olives or whatever other veggie tickles your fancy.


Here, I've chosen to blend healthy with, well, moderately healthy. Using cheese in any of your recipes will increase the caloric value of the meal, but some people loooove their cheese, me included.

Give this a try--the benefit outweighs the risk! I found out that using TWO wrappers per side of the ravioli makes for a sturdier, and less likely to burst pocket. I've shown you pictures of the carnage to prove my point...


Wonton Wrapper Ravioli

Adapted from ideas by Rachael Ray and around the Internet

Ingredients:


1 bunch of spinach, washed and chopped roughly
1 clove garlic, minced
1 Tbs olive oil
1/2 cup cottage (or ricotta, fancy pants) cheese
1/2 cup mozzarella, and extra for garnish, shredded
1/4 cup Parmesan, shredded
1 package wonton wrappers (the pack I used had 60 wrappers, each about 2"x2")

Procedure:

1. Heat the olive oil in a skillet over medium heat. Add the garlic, and when it begins to sizzle, add the spinach and saute for a few minutes, until wilted, then transfer to a large bowl. Meanwhile, Start a large pot of water boiling.

2. Combine the cheeses with the spinach until thoroughly mixed.

3. Prepare a floured surface for the wonton wrappers. Set a small bowl of water and a pastry brush (or you can use your finger) nearby. Lay out the wrappers on the surface (in stacks of two if you wanted them to hold together), side by side.

4. Place a dollop of the filling mixture in the center of each wrapper, then trace the outside 1/4" of the wrapper with a brush or finger dipped in water, and do the same to the wrapper you place on top, water sides facing each other.

5. Align and press down the top wrapper on the bottom wrapper. I chose to decorate the edges by going around them with a fork, but I didn't do the control experiment to see if they would hold together without the fork scoring. Sigh.

6. Place the sealed ravioli one at a time (to prevent initial sticking) carefully in the water, and allow them to boil for about 2 minutes. They will float to the top when ready (just like dumplings!).

7. Serve with your favorite pasta sauce (or whatever goes well with your filling of choice!).


Sunday, July 5, 2009

Lasagna Roll Ups


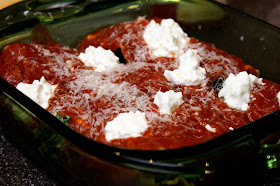
Lasagna roll ups are made with the same ingredients as traditional lasagna, only the assembly is a little different. I think they're a fun way to change up a dish, without going through the labor pains of experimenting with something that is not broken to begin with. I will caution you that these are a little bit more messy than traditional lasagna, but are worth a try if you want to pep up an old recipe!


I made this particular dish with broccoli and olives--not typically what you'd find in lasagna, but still pretty tasty! I recommend using fresh spinach, sauteed with a little garlic, and mushrooms for a first try. The broccoli's odd shape made these roll ups even more messy (and frustrating for Tony), but the combination of broccoli and olives was delicious!


Lasagna Roll Ups

Serves 4

Ingredients:

8 whole wheat lasagna noodles
1 large crown of broccoli, cut up into bite sized florets
1 small can of sliced black olives
3/4 cup low fat cottage cheese
1/4 cup shredded parmesan cheese, plus more for garnish
1 cup marinara sauce (your favorite kind)


Procedure:

0. Preheat oven to 350 F.

1. Boil lasagna noodles until al dente, about 8-10 minutes. Drain and rinse with cold water, then coat with a little olive oil to prevent the noodles from sticking to one another.

2. While the noodles are boiling, steam the broccoli in a steamer basket until bright green and slightly tender. Drain and set aside.

3. In a large bowl, combine olives, broccoli, cottage cheese and parmesan. *If you would like, you can also add 1/4 cup of the marinara sauce to this mixture*

4. Lay out a lasagna in the palm of your hand. Fill the middle with a heaping spoonful of the mixture, then form into a roll, and put the seam side down in a greased 8"x8" glass baking dish.


5. Add any of the leftover filling mixture to the top of the rolls. Cover evenly with the marinara sauce, and top with extra cottage or parmesan cheese as desired.

6. Bake at 350F for about 25-35 minutes, or until bubbly and the cheese on top is melted.


Wednesday, July 1, 2009

Open Faced Blueberry Pie


I don't really have a whole lot of time to make my own pie crusts, so normally I just use the refrigerated/frozen store bought crust. If you are a pie crust fanatic and have the time/patience/energy to make your own from scratch---more power to you. Use that recipe for this blueberry pie, and I'm sure it will put this pie over the top!


I recently bought a boat-load of fresh blueberries, because they were on super-sale at the local market. I knew fresh blueberry pie was the way to go, but I also knew I only had one crust in the freezer.


Normally, whenever I think of blueberry pie, I think of the lattice topped steaming pie on a country window sill, and I was skeptical about trying this recipe. But let me tell you, this pie is FANTASTIC, easy and definitely worth a try if fresh blueberries are in season!


Open Faced Blueberry Pie


Ingredients:

1 pre-made pastry crust, thawed
1 egg white
4 cups blueberries (or about 3 6-80z packages)
1/2 cup water, plus 2 tablespoons water, divided
2 Tbs cornstarch
1/2 cup sugar (or Splenda)
2 tsp freshly squeezed lemon juice
Pinch of salt

Procedure:

1. Preheat oven to 425 F. Lay pie crust on pie plate, and flute edges/do whatever pattern you like around the rim of the crust. Place in fridge while the oven preheats.

2. Place parchment paper or foil in the bottom of the crust, and weight with dry beans or pie weights. Place foil around the rim of the crust (or use a handy silicone pie rim), so the edges of the crust don't burn. Bake for 20 minutes.

3. Remove the beans/weights, and prick the bottom and sides of the crust several times with a fork. Return to the oven, and bake for an additional 5-10 minutes, or until the crust is golden brown.

4. Allow the crust to cool 10 minutes, the brush egg white over the crust.

5. While the crust is cooling, prepare the filling. Choose 1 cup of the softest blueberries, add to a saucepan with 1/2 cup water, cover and bring to a boil. Whisk the cornstarch and water in a separate bowl, and set aside for later.

6. Once boiling, lower the heat to a simmer, and constantly stir the mixture for about 4 more minutes, or until the blueberries burst.

7. While stirring constantly, add in the cornstarch mixture, lemon juice, sugar and salt. Stir until the mixture thickens and becomes translucent.

8. Remove the mixture from the heat, and immediately fold in the remaining three cups of blueberries. Turn the mixture out into your pie shell, and allow the pie to sit at least a few hours before serving.

9. Top the pie with whipped cream, vanilla ice cream, or simply enjoy it plain!