Wednesday, February 25, 2009

Homemade Vanilla Extract

Let me start by saying, if the vanilla beans aren't on sale, this do-it-yourself-and-save type recipe has a high up-front cost. I was fortunate enough to stumble upon 10 vanilla beans for about $7 at Costco a while ago, but I noticed that they recently jumped in price a bit to $12.


Expensive little buggers.

Anyway, this is (theoretically) a renewable recipe. Vanilla extract is essentially made by immersing vanilla beans (split or whole, depending on the strength of extract you are looking for) in alcohol for a period of time in order to extract the organic molecules that make up the "vanilla" flavor that we've come to love. The recipe is renewable because once the vanilla beans have been immersed in the alcohol (vodka and rum are the most popular choices) you can decant (pour off) the liquid, fill 'er up again, add a bean or two, and you're making a whole new batch of extract. I think this would be a pretty neat gift to give a Christmas, provided you had cute bottles to put the extract in. Moreover, you can wow all your friends by saying you know something about food chemistry. Just say "aldehyde" "enzyme" "ester" and "nummers." It'll definitely get the point across.

I read a paper from the early 1900s about vanillin (one of the major organic molecules associated with vanilla extract and flavorings) a few weekends ago, but I can't find it now. Story of my life. I was going to sound all smart and cool, and then the plans fell through.

Y'all still love me though, right? Mom?? You still there?

So if you have some extra booze and some vanilla beans lying around, you might as well make this extract. 

The amounts listed below are based on a back-calculation from the FDA standards, assuming that 13.35 oz of beans is equal to about 7.5 whole beans (I gleaned this figure off of a message board somewhere...), with a few calculations and a little dimensional analysis...

hang on....carry the 4...


Well, I'll spare y'all the math, but rest assured that there are about 6 beans per cup of extract (which should be about 35% alcohol). 

Sooo...that's what I did! I used an old Starbucks bottle as the storage vessel, and initially sterilized the bottle with boiling water before killing all the other nasties by pouring vodka in it :). Then I just shoved the beans in (unsplit for this go around), and pushed them below the solvent line with a sterile knife.
  
I'll try to update every once in a while to show y'all the coloring change of the solution, and what happens when you shake the bottle up every week. (Ahem, obviously those won't be black and white photos...)


I hope my randomness has at least been slightly entertaining, if not educational. More information about vanillin and the vanilla bean drying process (which is actually pretty cool--did you know that the vanilla bean is actually the fruit of a particular type of orchid??), consult wikipedia :).

Monday, February 23, 2009

Mashed Potato Pancakes


What does one do with leftover mashed potatoes?

TATER CAKES!

Leftover mashed potatoes are actually one of the few leftovers that I think taste relatively like the freshly cooked dish. If you don't have a handy leftover main dish, however, you may find yourself at a loss as to how to serve them. Well, this quick recipe may be your answer!

I served these with scrambled eggs and sausage as a "breakfast-for-dinner" type meal. I'll definitely make this recipe again!

Mashed Potato Pancakes

Ingredients:

2 cups leftover mashed potatoes
1 egg, beaten
salt and pepper to taste
about 1 tsp butter

Procedure:

1. Melt butter in skillet on medium-high heat.

2. Mix together egg, mashed potatoes and spices.


3. Drop heaping spoonfuls of the mixture on to the hot skillet, press down until you make a 1/2" thick cake.

4. Be patient! Don't flip these over until the bottom is golden brown--they'll just fall apart on you. Yes, I found this out the hard way.

5. Cook until golden brown on both sides, and steaming hot in the middle.


I served these with Louisiana hot sauce for an extra kick. Yee haw.

Saturday, February 21, 2009

The Meal o' Love Part 3: Strawberry Shortcake


Strawberry shortcake is definitely what I would define as a summer dessert, but it's featured on many Valentine's day menus because of the dessert's colors (strawberries are definitely what I would call a staple food of Valentine's day), and because of it's appeal as a heart-felt, comfort food.

When I was growing up we'd have strawberry shortcake all the time, but the cake portion was generally a store bought commodity, which, let's face it, is just easier.

Since this was a meal made to show my affection to Tony, however, I decided that I wanted to make just about everything from scratch, including the cake and the whipped cream.

Here's how the story goes....

Strawberry Short Cake
Part One: Homemade Yellow Cake
(adapted from an AllRecipes page: David's Yellow Cake)

So, perhaps I'm just a dummy, but I really didn't know why yellow cake was, well...yellow. I had always assumed that the store bought boxes just contained some sort of coloring to make the cake look that way, which is most likely true.


Real, homemade yellow cake, however, is yellow because of all the dang egg yolks you put into it! I was amazed how they were able to turn the white mixture of the creamed butter and sugar into a deep, rich yellow color. Beautiful!


Ingredients:

1 cup butter
1.5 cups granulated sugar
8 egg yolks (use the white for a tasty omelet!)
1.5 tsp vanilla extract
3/4 c milk
2 cups cake flour (I used Softasilk)
2 tsp baking powder
1/2 tsp salt

Procedure:

1. Preheat oven to 350F. Grease and flour two 8" cake pans.

2. Cream butter and sugar until fluffy. Beat in egg yolks one at a time (or, if your like me and accidentally break a yolk or two, guesstimate :)...), and then mix in the vanilla extract.

3. Alternately add flour and milk, mixing only until things are all incorporated (i.e. don't overmix).

4. Pour the batter into the pans and bake for about 25-30 minutes, or until a toothpick inserted into the center comes out clean.

5. Transfer to cooling rack after about 15 minutes.

This yellow cake is absolutely delicious! It's soft and moist, and definitely the perfect accompaniment to strawberries and whipped cream!

Part Two: The Strawberries

Gage how many strawberries you need to how many servings your making. It took the two of us about 3 days to get through a 1 lb box of strawberries.

Cut the strawberries into bite size pieces and sprinkle them with a little bit of sugar. Allow them to mellow in the fridge for a few hours.

Part Three: The Whipped Cream

I had no idea that whipped cream that wasn't either Cool or Redi existed until about a year ago. I've never made whipped cream before, but that sure wasn't going to stop me from trying to impress Tony with my cooking skills...

Ingredients:

1/2 pint heavy whipping cream
1 tsp vanilla extract
1/4-1/3 cup of sugar (or Splenda)

1. Mix all the ingredients together.

2. Using an electric mixer (I tried doing this by hand, and I got tired REALLY fast. Embrace technology, people.), whip the cream until peaks form.


Part 4: Assembly

Layer the cake in chunks on the bottom of a bowl. Top with the chopped strawberries, and finish off with the whipped cream. 


Enjoy with a glass (or seven)  of your favorite dessert wine!

Wednesday, February 18, 2009

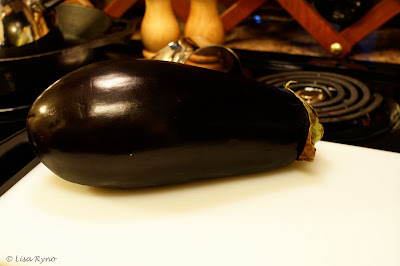
Meal o' Love 2: Eggplant Parmesan


If someone would have told me two years ago that Tony's favorite home-cooked meal (of mine, at least), was eggplant parmesan, I would have scoffed, snorted and downright laughed. Tony is a "red meat and 'taters" kind of guy, although he doesn't complain whenever I try and sneak in a vegetarian meal here and there. The only exception to this rule occurs when the vegetarian meal contains tofu, at which point Tony graciously eats everything except the tofu, and then goes to Subway.

Anyway, for the birthday/Valentine's day dinner I cooked for the hubatron, I pulled out the stops and made this recipe of eggplant parmesan. It's gooey, delicious, and smothered with nummy calories. And, boy, was it worth it. We were about 4 glasses of wine into the evening by the time we ate this dinner, and it tasted better than ever :).

I hope y'all like it as much as we do!

Eggplant Parmesan

Ingredients:

1 medium eggplant
salt and pepper
2 eggs, yolks broken and incorporated
1-2 cups Italian bread crumbs
1/4-1/2 cup of canola oil
1 bottle of favorite marinara sauce
1/3 lb mozzarella cheese, shredded and divided
1/4 lb parmesan cheese, grated and divided
1/2 Tbs basil, divided


Procedure:

1. Peel the eggplant and cut into 1/2" thick slices. Make a mixture of salt and pepper and dip each slice into the mixture. Stack the slices on a plate, cover with another plate and weight down the top plate with a full can of whatever you have in your pantry. You need to apply pressure on the eggplant for about 30 minutes in order for a bitter, purple liquid to come out. Place the weighted stack in the fridge for 30 minutes. Drain and discard the dark liquid on the bottom of the plate.


2. Heat about half of the canola oil in the iron skillet (use as much as you need depending on the size of the skillet--remember, you're frying here!) on medium-high heat. Preheat the oven to 350F.

3. Coat the eggplant slices in egg and then in the breadcrumbs. Warning: this is a bit messy. Wait until the oil is hot (you can test this by sprinkling a few breadcrumbs in the oil to see if they sizzle), and then place the coated eggplant slices in the skillet. Wait until the bottom is a light brown, then carefully flip using tongs or a fork. Both sides should be a light (or dark, if you're like me and you like it crispy!) brown.

4. Coat a 9"x13" glass pan with cooking spray. Coat the bottom of the dish first with a thin layer of marinara sauce.

5. Layer the eggplant, thin slices of mozzarella, grated parmesan and a light sprinkling of basil. Coat the top with another layer of pasta sauce. Repeat until all the eggplant is used. Finish by layering on mozzarella and a healthy amount of parmesan.

6. Bake uncovered for about 25-30 minutes, or until cheese is gooey and the sauce is bubbling.


7. Enjoy all that hard work!


Monday, February 16, 2009

The "I Love Tony" Meal: Part One


Appetizers are not really a common occurrence in our house. Normally, we fix dinner, we eat and then we're done.

A few weeks ago, Tony and I ate dinner out at an Italian (Tony's pronunciation: eye-talyun...:)...) restaurant, and we were starving. The cheapest appetizer available was their signature bruschetta, so naturally, that's what we ordered. I had never had bruschetta before that I could remember, probably because I've only started liking tomatoes within the last year or two. The bread was chewy yet crisp, the cheese melty and delicious, and the fresh tomatoes and basil were juicy and fragrant--I could have eaten the whole thing as a meal!

I decided to attempt to recreate this bruschetta for my Valentine's Day/birthday dinner for Tony. I have to say that the recipe I made up on the fly turned out surprisingly well! I hope y'all have time to give it a try--the cutting up of the tomatoes takes the most time, everything else is a snap.

Bruschetta

Ingredients:

4 slices of fresh French bread (about 1/2" thick)
1 roma tomato, diced
1 clove garlic
2 Tbs butter, melted
A few sprigs of fresh basil, chiffoned
1/3 cup shredded mozzarella


Procedure:

1. Preheat the oven to 450F and move the rack to the top (broiling position). I lined the pan I was using with foil and then lightly sprayed with cooking spray. Place the sliced bread on the pan.
2. Mince the garlic and mix it in to the melted butter. Brush the garlic butter mixture onto the slices of bread.

3. Place a thin layer of shredded cheese on the bread. Top with the diced tomatoes.

4. Add another layer of cheese, and finish the mini-mountain you've certainly created with the fresh basil. Dry basil works in a pinch, but definitely doesn't deliver the same flavor.

5. Place on the top rack for about 3-5 minutes until the cheese has melted and the edges of the French bread have become toasty.


Enjoy!

Thursday, February 12, 2009

Light Wheat Bread

Over the weekend, I made some pretty delicious wheat bread for sandwiches. I followed smitten kitchen's recipe exactly, and I think she eloquently and thoroughly explained the procedure, so I'm just going to post up the pictures.

I'm definitely going to use this recipe again--and in bulk! Making a few loaves and freezing them for later is just as much work as making one loaf, and when you're feeling like a lazy bum you can just defrost one and, voila! Homemade bread.

Mixing the dry ingredients....


My favorite part is the kneading. It's therapeutic.


Finished product! I brushed a little melted butter on top to add some flavor.


Tony took these photos of the sliced bread---I think they're really great! I think he did it out of neccessity, he knew I wanted pictures of the bread, but he really wanted a sandwich :).


NUTELLA!


P.s. I feel a little dorky for copyrighting all my pictures, but I'd be pretty cranky if I found out that someone else thought it was good enough to use without telling me, and then they became famous while I was still stuck in grad school. Mild exaggeration, people. Hardy har har.

Tuesday, February 10, 2009

My Favorite Drink: White Russian

I'm definitely not a big drinker. In fact, I truly dislike the taste of most alcoholic beverages, and I don't enjoy the "I'm-not-fully-in-control" aspect of drinking either. I find most beer and wine pretty un-appealing, and I'm not really in the mood to gain the "aquired taste" required for such drinks. I like to spend my calories elsewhere, like on cookies and Nutella. Or cookies topped with Nutella...Wait, what? Who said that?

The exceptions to this factoid about me lie within two drinks and a shot. The first is the White Russian, which, if I can say so eloquently, is nummers. Coffee liqueur, a hint of vodka and milk (or cream) is all you need for a White Russian. Not a whole lot to dislike there, provided you enjoy coffee.

The second drink is called a Venetian Sunset. It's served at Olive Garden, which indicates that it's not exactly gourmet, but it's still tasty. It's made with grenadine, Martini and Rossi Asti (sparkling wine) and pineapple juice. This is about as girly as I can handle.

The third drink I enjoy is actually a shot (I can actually hear my mom shuddering as I type this). I cannot say the name, because it was discovered by my good friend, V-Ron, while looking up drinks for a bachelorette party. If I told you the name, Grandma Ryno would faint, and the other three readers (Mom, you still there?) would probably give up on me. Anyhoo, it's made up of 1 part amaretto, 1 part coffee liqueur, and a dollop of whipped cream on top. Decadent, I know.

So, now that everyone who's left knows all about my drinking preferences, let's get to the recipe.

White Russian


So this is the traditionally accepted recipe:

1 part Coffee Liqueur (Kahlua)
1 part Vodka
1 part cream

Procedure:

Place several ice cubes in a tumbler glass. Pour liqueur, vodka and then cream on top of the ice cubes. Some hoity toity people don't stir, but I think they're nuts. Who wants an entire mouthful of Kahlua without any creamy goodness? Not me.

This, I assume, is one tasty, calorie-laden drink. Obviously if you want to impress people, this is the one you should choose.

This next one is the pajama-wearing, movie-watching, Friday-night-relaxing version:

1 part Kahlua
1 part Vodka (I actually normally don't include this, since we rarely ever buy vodka, but when we do, we normally buy the vanilla infused kind, which is extra delicious in this drink, but still tastes like rubbing alcohol when ingested directly)
2 parts milk

This follows the same procedure as above, and I always mix.

Saturday, February 7, 2009

Banana Bread

This recipe was used out of necessity, and for my compulsive need to not be wasteful. We had a few bananas, you see, that were about to cross over to the dark side. They HAD to be used before it was too late...dun dun dun.


I found particular recipe on one of my favorite recipe websites: Simply Recipes. This website is a fast and reliable resource for an every day cook. I made a slight modification to the original recipe by adding about 1/3 cup of walnuts to the batter, and sprinkling a handful of walnuts on top of the cake before it was added to the oven.

This bread makes for a tasty breakfast or dessert--whatever your preference. The few ingredients required make this a fast recipe that can be popped in the oven while other things can be finished up (cleaning, laundry, reading about cardia bifida in zebrafish...wait, what?).
Ingredients:
3 ripe bananas
1/3 cup butter
1/2 cup Splenda for baking (or 3/4 to 1 cup sugar)
1 egg, beaten
1 tsp vanilla extract
1 tsp baking powder
pinch of salt
1 and 1/2 cups all purpose flour
1/3 cup chopped walnuts

palm-full of walnuts for garnish

Procedure:

1. Preheat oven to 350 F.

2. SMASH BANANAS! WOO HOO!


3. Calm down. Enjoy your moment of being destructive, then, get over it.

4. Add melted butter and mix thoroughly with a wooden spoon. Add sugar, egg and vanilla.

5. Sprinkle baking powder and salt over mixture, and incorporate thoroughly.

6. Sift in flour, and finally, add the walnuts.


7. Pour into a greased, standard loaf pan, and top with walnuts.

8. Bake for about 1 hour, and cool on a rack.

9. Hide bread from hungry husband. He may eat more than you want him to...:)

Thursday, February 5, 2009

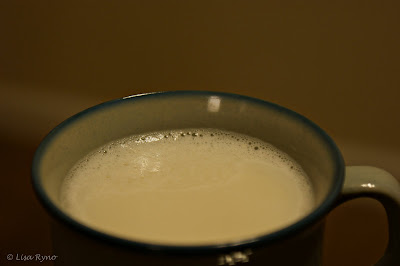
Kettle Tea


This recipe comes from my mom, who knows how to make a darn good kettle tea. Basically, it's a soothing mixture of sweetened, warmed milk with vanilla. It instantly calms my nerves, and the aroma is to die for. I use Splenda and skim milk, so it isn't unreasonably unhealthy. 

This is the perfect way to wind down after a long day...

Ingredients:

1 cup milk
1-2 tsp sugar (or Splenda)
1 tsp vanilla extract

Procedure:

Mix all together and heat for about 1 minute and 30 seconds in the microwave.

Relax. Decompress. Barter for a foot rub. 

Tuesday, February 3, 2009

Vanilla Chai Shortbread Cookies

Well, the cookies have all surely been eaten by now, and I'm not in danger of ruining a surprise...so here's the recipe!


Vanilla beans are intimidating, particularly if you've only ever used one once before. They are strange looking little devils, and surprisingly, require a sharp knife and a steady hand to open. I wrote an earlier post to help those who may be like me--a vanilla bean novice.

These shortbread cookies are great with tea--actually they were inspired by the Bigelow Vanilla Chai tea! This recipe has gone through several adaptations, but the original recipe is a Martha Stewart Special, from her holiday 2008 magazine. They're not too sweet, and not overpowered with vanilla or chai. They're originally designed to be used with a cookie press, but since that is one of the few kitchen gadgets I don't own--I opted to roll them into balls and press them flat instead.

Alrighty, let's get to it.

Ingredients:

1 Vanilla bean, split and seeds removed
1 cup unsalted butter, softened
1/2 cup sugar
2 1/2 cups all purpose flour
1/2 tsp salt
1 egg
2 chai tea bags (any flavor would work)
2 tsp vanilla extract

Procedure:

1. Prep the vanilla bean. If you are not used to doing this, it may take a few minutes...

2. Grind the tea to a fine powder. No one wants a big o' leaf in the middle of their cookie. I used a mortar and pestle, but you could just place the contents of the tea bags in between 2 pieces of waxed paper and use a heavy object (meat tenderizer) to grind to a powder.


3. Whisk the salt and flour together.

4. Cream the butter, sugar and vanilla bean seeds in a mixer on medium speed until the mixture is light and fluffy. I swear if I could, I would have eaten it just like this on toast. Or with a spoon...ahem. Doesn't it look great??


5. Add the egg, vanilla extract and chai tea to the mixture, and fully incorporate.

6. Then, add the flour to the wet mixture with the mixer set on a slow speed, until everything is all mixed together.

7. Refrigerate for about 30 minutes. Start preheating the oven to 350 F.

8. Form small balls with the cookies, flatten slightly dip the top in turbinado (raw) sugar if desired, and place on a greased cookie sheet a few inches apart from one another.

9. Bake for about 15 minutes, turning the cookie sheet halfway through, or until the cookies begin to brown slightly.


Voila! Enjoy!

Sunday, February 1, 2009

The Vanilla Bean

Later this week I'm going to post a new cookie recipe, but I'm going to have to wait a bit, since the cookies are kind of a gift and I don't want anyone getting any early surprises...

I will say that the recipe used a vanilla bean (Tony prefers the word "niller", so hey, whatever floats your boat), which I had never really worked with before. Oh sure, I'd see the little devils in the store, expensive as all get out right next to their cheapo cousin, vanilla extract.

I needed a vanilla bean for this recipe, however, and the redneck niller extract cousin was just not going to cut it. I also happened to stumble upon the vanilla bean motherload at Costco--10 beans for about $6. This may not be as cheap as buying them off the internet, but it sure beats buying 2 beans from McCormick for about the same price as at Costco!

So this was what my setup looked like today. Vanilla bean--check. Sharp knife--check. Super cute ramekin that I use for just about everything when I'm cooking--check. We're ready to go!


First split the vanilla bean lengthwise down the center. This actually requires some force to get through the pod. I had to attempt this a few times before getting to the good stuff.

This is what the inside looks like, and those little black specks are the seeds--so close to victory!


Take your knife and gently scrape the seeds out. I had to do this a few times, and made a gigantor mess, but by the end I was able to get at least a good teaspoonful, maybe more, of vanilla bean seeds. Success!


Happy Sunday, y'all!

LinkWithin

LinkWithin Related Stories Widget for Blogs