Wednesday, April 29, 2009

Lisa's Single Serve Pesto


So, let me be the first to tell you I don't know much about pesto, other than what my college cafeteria immersed their pasta in periodically. My basil has been growing, and I've been more than eager to use some of the fresh plant in my cooking. 


Perhaps I've been too eager. I was only able to carefully cut about 1/2 cup of fresh leaves, definitely not enough for a full recipe of pesto. I've searched around online, and my tried and true go-to for home-style recipes has been www.simplyrecipes.com. Elise has an excellent fresh basil recipe that I would like to try in those proportions one day.


For today, you get my single serve, questionable amounts rendition of fresh pesto sauce. 

I have to say...it was mighty tasty. The fresh garlic and basil gave the sauce a slight spicy kick that I really enjoyed!


Lisa's Single Serve Pesto

Ingredients:

1/2 cup fresh basil leaves, rinsed and blotted dry
1 palm full of pine nuts (I think about 1/6 cup)
1 clove fresh garlic, minced
1/4 cup olive oil (or however much you want to get your personally desired consistency)
1/4 cup freshly grated Parmesan cheese

Procedure:

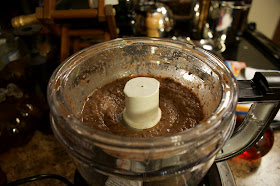
1. Pulse the basil and pine nuts in a food processor or blender until combined.

2. Add the minced garlic, and pulse a few more times.

3. Slowly drizzle in the olive oil while the food processor or blender is running.

4. Finally, add in the grated Parmesan cheese, and blend until the consistency you desire is reached.


Enjoy! It's as simple as that! I topped my tortellini with the pesto and then a bit more Parmesan cheese--you can't go wrong with more cheese, people!


Sunday, April 26, 2009

Corn and Black Bean Soup


This recipe is a mish-mash of most of the black bean soup recipes out on the web. I took a few ingredients here, a few there, and put them together into something that I thought Tony and I would enjoy. 


Once you learn the basics of making soup, it's surprisingly easy to throw flavors together to fit your mood. Tonight, I wanted to have a Mexican dish, but without all of the tortillas, re-fried beans and ground beef (yesss...I know that isn't the whole of Mexican food, but that's what I probably would have made otherwise, minus the re-fried beans, yak!).


Try this recipe, or adapt and add on to it as you see fit!


Note: There are a lot of pictures in this post. This is primarily because this time, I was not the photographer! Tony took all of the pictures while I frantically chopped, pureed, stirred and sweated. I was scanning through the photos, and I noticed that I liked almost all of them! So, you get blessed with a bunch of photos for this recipe :). Enjoy!


Corn and Black Bean Soup

Serves 4

Ingredients:

2 Tbs vegetable oil
1/2 cup diced onion (or more, if you like lots of onion)
2 cloves garlic, minced
1 cup celery, sliced
1 cup carrots, sliced into discs
2 cans black beans, rinsed and drained (or 3/4 bag of dried black beans, soaked overnight and drained)
1 can whole kernel corn, rinsed and drained
1 can light (fat-free), low sodium chicken broth
2 tsp red wine vinegar
Dash (or a little less than 1/4 tsp) liquid smoke
1 tsp cumin
1 tsp chili powder
Dash of cayenne pepper, or a pinch of red pepper flakes for extra heat
1/4 tsp salt

Procedure:

1. Heat the vegetable oil in a soup pot over medium-low heat. When the oil is hot, add the onion, garlic, celery and carrots.

2. Saute the vegetables for about 10-15 minutes, or until the onions are translucent and the carrots are beginning to be tender.

3. Take about 1 cup of the black beans, mix with 1/2 cup of the chicken broth and puree in a food processor or blender until smooth.

4. Once the sauteed veggies are tender, add the pureed beans, whole beans, corn, spices, vinegar and liquid smoke to the pot.

5. Bring the mixture to a boil over medium-high heat, then reduce to a simmer (setting 2-3 on my range top). Simmer uncovered for 35 minutes on low heat, until the soup is thick like a stew. I added about 1/4 cup hot water to the soup at 30 minutes so it wasn't too thick.

6. Serve garnished with cheese, if you like. I shredded one of my Babybel Gouda cheese wheels on top and it was delicious! I also served with a side of packaged (Martha White) Mexican cornbread, which went with the soup excellently!


Wednesday, April 22, 2009

Homemade Yogurt


Recently, I found this article in the New York Times online health section on homemade yogurt and I had to give it a try.

You see, right now in lab I am expressing a particular human protein in a bacteria called E.coli. Basically, I'm feeding bacteria, making them fat and happy, all the while slipping extra DNA into their susceptible little genome, then flipping a switch that makes the buggers pump out the protein like it was their only mission in life. Which, for my purposes, IS their only mission in life. Ah, if it could only be so simple.


The bacteria featured in yogurt are (hopefully) not E. coli., but rather lactic acid bateria, as the article mentions.

If you dare, try and make your own homemade yogurt--it's much more simple and less time consuming than expected. Plus, you can reap the reward of making something at home that most people wouldn't dare try to undertake!


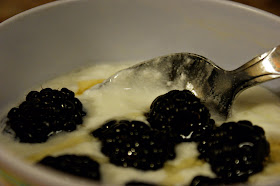
I have to say, the consistency of this yogurt is not like that at the store, there are other additives and stabilizers that give the yogurt more structure. This yogurt is a little more runny, but still delicious when served with fruit and honey!


Homemade Yogurt

Ingredients:

1 quart whole milk (the article suggests that this tastes the best, but I'm also going to try 1% or 2% soon to see if it affects the taste and texture dramatically)
2 Tbs starter culture (plain yogurt from the store that has live active cultures)

Procedure:

1. Pour the milk into a saucepan, and heat over medium heat until the milk temperature reaches 190 F. (I used an instant read thermometer, and measured the temperature while stirring). The milk will be steaming, not boiling.

2. Take the milk off of the burner, and allow to cool in the saucepan until the temperature reaches approximately 120 F.

3. Take a few spoonfuls of the warm milk and mix with the starter culture in a separate bowl, diluting it so it can be better incorporated into the whole mixture. Then, mix the starter culture into the main saucepan, and transfer to an appropriate sized jar or tupperware, which has been sterilized with boiling water.

4. Swaddle (for lack of a better word) the container in several towels (I used 2), and place in the top rack of the oven with the light on. The light provides a warm environment, but is not nearly as warm as setting your oven to 200F.

5. Allow the yogurt to remain warm and still for about 4-5 hours, or until the yogurt has set. This means the consistency is thicker, and appears more like yogurt than milk. Move the container to the fridge to store for up to a week (or until things look funny...).

6. Enjoy with fruit, honey, granola, or whatever else your fancy might be!


Sunday, April 19, 2009

My First Attempt with Fresh Artichoke


I've never really experienced fresh artichoke before, although I haven't met an artichoke dip (probably not so fresh), that I haven't liked.

When I saw the fresh artichokes on sale at the grocery store this week, I knew I had to be adventurous. I wasn't sure what the outcome would be, but I knew that at least I hadn't blown a lot of money in the process.

I used this tutorial from Simply Recipes (who is always a good resource for learning how to cook).  


An artichoke can be simply eaten steamed with a little butter. First wash the artichoke, and discard all but one inch of the stem. Then snip off the little pointy barbs on the tip of the petals. Steam with 2 cloves of garlic and 2 slices of lemon for about 25-30 minutes, or until tender.

Peel the petals off one by one, until you get to the center. Here's were the tutorial mentioned above does a much better job of explaining what to do with the heart and choke much better than I ever could.


I melted some butter with a dash of thyme in it to serve with the petals, which you scrape the artichoke meat off of with your teeth (again, the tutorial is helpful and there are pictures...).

Be adventurous!


Wednesday, April 15, 2009

Kaye's Easy Cobbler


This is a recipe straight from Kaye (my momma), who's been making this for 30+ years. I remember eating this cobbler recipe, which was always made with peaches, at all ages and stages of my life, that is, until I moved a million miles away to Texas, and then another million miles away when we wound up in San Diego, CA. That's a lot of miles.


I was so surprised at the flood of memories after I took my first bite of the cobbler I prepared this weekend for Easter supper. It tasted almost exactly like Mom's! The beauty of this recipe is not only in its preparative simplicity, but also in the complexity of flavors coming from such simple ingredients. The buttery flavor that's added to the peaches, along with the slight crunchy and chewy-ness of the top layer compliment the sweetness of the peaches flawlessly.


It's a mom-missing dessert.


Kaye's Easy Cobbler

Serves 8-10 (Note: pictures are of a halved version of the recipe)

Ingredients:

1 stick (1/2 lb) butter
1 large can sweetened, sliced cling on peaches* (30 oz), (I used the no-sugar-added, Splenda sweetened variety)
1 cup self rising flour
2 Tsp. baking powder
3/4 milk
cinnamon sugar

*Use any sweetened, canned fruit here, or use fresh fruit, adding brown sugar to sweeten to taste.**
Procedure:

1. Place the stick of butter directly into a 9"x13" baking dish. Place the dish into a cold oven, and begin the pre-heating process to 375F.

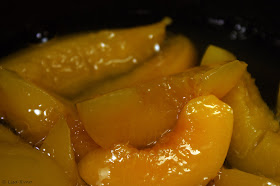
2. Meanwhile, place the peaches with the juice in a saucepan, and bring the juices to a soft boil. Once boiling, remove from high heat, but keep the fruit warm.

3. Mix the flour, sugar and baking powder with the milk in a separate bowl (this makes the batter).

4. Once the oven has pre-heated and the butter has melted, pour the batter directly into the center of the butter mixture--DON'T STIR.

5. Then, pour the hot fruit on top, again---DON'T STIR. Sprinkle with cinnamon sugar. Bake at 375F for about 30-35 minutes, or until the top crust is brown.

My Mom's Notes:

DO NOT STIR fruit into batter. When you add the hot fruit to the batter, it will start to puff up right away. The fruit will sink to the bottom while cooking, and the batter rises to the top to make a nice crust.

I always use lots of fruit, don't skimp.

Tasty and very easy! Enjoy!


Sunday, April 12, 2009

Slow Cooker Pot Roast


I've used this recipe multiple times now, and each time I make it I am more impressed by how something so simple could taste so good! Since this recipe uses a crock pot, you can prepare everything in the late morning, go about your day and when you come home (to a very fragrant house), the meat is ready to be served.


Note: Tony did the dirty work of touching the raw meat. I can't really stomach that quite yet.

I found this particular recipe here, after a quick Google search of "pot roast recipes." I had to change the recipe a little bit, as it was far too much food for just two people to eat, even taking into consideration leftovers.


Yay, more icky, raw meat pictures!
Slow Cooker Pot Roast

Makes 4-6 Servings

Ingredients:

1 beef roast, about 2 lbs
1/2 packet of Italian dressing mix
1/2 packet of ranch dressing mix
1/2 packet of turkey gravy mix
1/2 cup water

Procedure:

1. Place the roast in the crock pot, ensuring that the most surface area is in contact with the bottom of the crock pot.

2. Mix the dry ingredients, then add the water and whisk briefly, until there are few lumps. Pour over the roast.

3. Cover and cook on low for 7-8 hours. The meat will be tender "fall apart" when it is done. Allow the meat to rest a few minutes on the cutting board, then pull apart with forks and enjoy!


Happy Easter! He is Risen!

Side Note: My mom and I both cooked this dish for Easter supper this year, as a way to be "together" while still being 2,000 miles apart. I think we've started a fun tradition!

Wednesday, April 8, 2009

Cinnamon Sugar Pita Chips


I *really* love the pre-packaged cinnamon sugar pita chips, either by Trader Joe's or Stacy's. There are a few problems with the chips though: 1) They're pretty expensive for the amount you get and 2) I can inhale an entire bag if I really want to. Sometimes, y'all, I really want to.

This evening I whipped up a quick fix for cinnamon sugar pita chips that can be used with either plain or whole wheat pitas that you may have around for your lunches, or perhaps to make another pita chip recipe...

Give these a try if you need a fast sweet fix, or if you want a really special dessert, crumble some of these over vanilla ice cream!


Cinnamon Sugar Pita Chips

Ingredients:

1 whole wheat pita pocket, divided into 8 wedges
1 Tbs butter, melted
1-2 Tbs cinnamon sugar (I use a 4:1 granulated sugar: Saigon cinnamon ratio)
turbinado sugar for garnish


Procedure:

1. Preheat the oven to 400F.

2. Brush the top and inside of the wedges with butter. Sprinkle the top and inside with a hearty coating of cinnamon sugar. Finish off with a sprinkling of the turbinado sugar on top of the wedges.

3. Bake 5 minutes in the middle/top rack of the oven for chewier pita chips. If you like the crunchy texture, bake for roughly an extra 3 minutes, or until they turn a darker brown (don't let them burn!).


Friday, April 3, 2009

Simple Sauteed Brussels Sprouts


These brussels sprouts are very similar to this recipe I posted a while back, but not incorporated into any pasta.


This recipe is painfully simple--all the more reason you should give it a try and incorporate more fresh vegetables into your daily diet!

Simple Sauteed Brussels Sprouts


Ingredients:

1 Tbs butter
1 Tbs olive oil (this prevents the butter from burning, you can omit this ingredient if you use clarified butter)
1 clove garlic, finely minced
1 lb brussels sprouts, halved or quartered
1 tsp seasoned pepper (or a few good grinds from a pepper mill)
1 shake of crushed red pepper (if you want to spice it up a bit)
1/4 cup of water or chicken/vegetable broth
salt to taste

Procedure:

1. Heat butter and olive oil in a large skillet on medium heat.
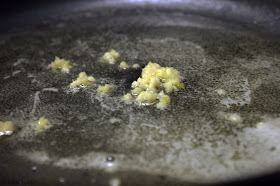
2. Once the butter is melted, add the crushed garlic and saute until it sizzles.
3. Add the brussels, and seasoned pepper. Saute for about 3 minutes, or until they begin to develop a deeper color of green.
4. Add the liquid (water or broth) into the pan along with the crushed red pepper. Allow the brussels to cook until tender (they should not be covered by the liquid), about 4-5 minutes.
5. Add salt to taste, and serve either plain or with a grating of parmesan cheese!